Sunday, February 7, 2016

Double Thick Doily Crochet Potholder

This cute and functional potholder is double thick so it will stand up the hottest pots and pans. The two pieces are crocheted and then joined with single crochet. This is a great project to use up your stash, and these potholders make great gifts.


Materials

You will need 3 balls of cotton yarn. I used Premier Home in Sunshine (Color A), Orange (Color B), and Citrus Splash (Color C). You will also need a US I/9 (5.50mm) crochet hook and a tapestry needle.

Stitches
Chain stitch – ch
Single crochet – sc
Slip stitch – sl st
Double crochet – dc
Front post double crochet – fpdc
Front post single crochet – fpsc
Shell – 5 dc

Back
With Color A ch3
Rnd 1: 12dc into the 1st ch, join in 1st dc
Rnd 2: ch3, dc into the same sp, 2dc into each st around, join in 1st dc
Rnd 3: ch1 *sc into the next st, 2 sc into the next st* rep around, sc into ch1 sp, join in 1st sc
Rnd 4: ch3 *dc into each of the next 2 sts, 2dc into next st* rep around, dc into ch3 sp, join in 1st dc
Rnd 5: ch1 *sc into each of the next 3 sts, 2dc into next st* rep around, sc into ch1 sp, join in 1st sc
Rnd 6: ch3, dc into each st, dc into ch3 sp, join in 1st dc
Rnd 7: ch1, sc into each st, sc into the ch1 sp, join in 1st sc, turn
Rnd 8: ch3, fpdc around each st, join in 1st fpdc
Rnd 9: ch1, fpsc around each st, join in 1st fpsc
Rnd 10: ch3, dc into each st around, dc into ch3 sp, join in 1st dc
Rnd 11: ch1, sc into each st around, join in ch1, do not fasten off. Weave in tail from starting ch3.


Front
With Color B ch3
Rnd 1: 12 dc into the 1st ch, join in 1st dc
Rnd 2: With Color C join in any dc *ch3, sk 1 st, sc into next st* rep around
Rnd 3: sl st into 1st ch3 sp *ch5, sc into next ch3 sp* rep around, join in sl st
Rnd 4: sl st into 1st ch5 sp, ch3, 4dc into ch5 sp *sc into sc, 5dc into next ch5 sp* rep around, join in sl st
Rnd 5: sl st into 3rd dc of 1st shell *ch3, dc into next sc, ch3, sc into 3rd dc of next shell* rep around ending with a sl st into the 3rd dc of the 1st shell to join, fasten off Color C
Rnd 6: Join Color B in any dc, ch3, sc into next ch3 sp, ch3, sc into next ch3 sp, ch3, sc into next dc* rep around, end with ch3 and join
Rnd 7: sl st into 1st sc, ch3, 2dc into same sc *sc into next sc, 5dc into next sc* rep around, ending with sc into next sc, 2dc into last sc, join in 3rd ch, fasten off Color B
Rnd 8: Join Color C in the 3rd dc of a shell (ch3, dc into next sc, ch3 sc into 3rd dc of next shell* rep around, end with ch3, dc into next sc, ch3 and join in 1st ch
Rnd 9: sl st into 1st ch3 sp, ch3, 2dc into same sp *sc into next sc, 5dc into next ch3 sp* rep around, end with sc into next sc, 2dc into 1st ch3 sp, join in 3rd ch
Rnd 10: ch3 *dc into next sc, ch3, sc into 3rd dc of next shell, ch3* rep around, join in 1st ch, fasten off and weave in tails

Assembly
Once you have the front and the back crocheted, hold the two pieces together with the wrong sides together. Using Color A from the back, single crochet evenly around the outer edges joining the pieces.

Use stitch markers to hold the front and back together. Place them around the two pieces dividing them in fourths. The stitch markers will make it easier to crochet the two pieces together. 


The stitches will not match up exactly so you will need to ease the stitches in to join the two pieces. Work into the single crochet and around the chain stitches of the front piece, and into each single crochet stitch of the back piece. Once you have the pieces joined, they may look a bit wonky but you can stretch them out and make them even. 

Edging
Turn the potholder so that the front is facing you. Chain 1, single crochet around the edge, join in chain 1. Chain 3, skip 1 stitch, sc, chain 3, skip 1 stitch around, join in 1st chain. Fasten off and weave in tails. Enjoy your new potholder!

I hope you like this pattern. Check out my other patterns on Raverly and on this blog. Feel free to sell any items you make with this pattern. If you'd like to share the pattern, please share the link to this post or the link to my Raverly account. 

Let me know if you have any questions, or find any errors in the pattern. Thanks for stopping by! 
Stitches 'n' Scraps - Scrappy Stitchers Link Party

Tuesday, February 2, 2016

Easy Basket Weave Knit Washcloth

This cute washcloth is knitted up with only knit and purl stitches. By alternating rows of purl and knit stitches you create a pretty basket weave effect. 


I found a great video by Gaye Glasspie of GGmadeit on Facebook for the crochet cast on method. Be sure to hop on over to her page and give it a like. She has some great videos and designs for knitting. The crochet cast on creates a very nice and decorative edge, plus it is a great method to use when you have a lot of stitches to cast on. Unlike my other favorite method, the long tail cast on, you don’t have to estimate how much yarn you need for your cast on. You use the yarn as you go and crochet stitches onto the knitting needle.


Now don’t worry if you don’t know how to crochet. The crochet cast on is very, very, easy and I’m sure you’ll get the hang of it in no time. Here is her video:

Crochet Cast On from Gaye Glasspie on Vimeo.


New Stitch a Day has a video on the crochet bind off. This method also creates a pretty decorative edge and is very easy to learn. I used both of these methods in the washcloth pattern I’m about to share with you.


Okay, on to the pattern. I hope you like it!

Basket Weave Washcloth

You will need a skein each of cotton yarn in two colors. I used Premier Home yarn in Violet Splash (Color A) and Sahara Splash (Color B)

The pattern is knitted in sets of 5 plus 6. So you can make the washcloth larger or smaller as long as you cast on sets of 5 and then 6 more for the edging stitches.

With Color A CO 31
Rows 1-3: k
Row 4: k3 *p5, k5* rep ending with p5, k3
Row 5: k3 *k5, p5* rep ending with k5, k3
Row 6: Repeat Row 4
Row 7: Repeat Row 5
Row 8: Repeat Row 4

Row 9: k3 * p5, k5* rep ending with p5, k3
Row 10: k3 *k5, p5* rep ending with k5, k3
Row 11: Repeat Row 9
Row 12: Repeat Row 10
Row 13: Repeat Row 9

With Color B
Rows 14-23: Repeat Rows 4-13

With Color A
Rows 24-32: Repeat Rows 4-13
Rows 33-35: k, BO and weave in tails.

Please let me know if you find any problems with the pattern, I’ve tried to make sure the pattern is complete and easy to understand. I’d be happy to answer any questions you may have, and I’d love to see your dishcloths you make with this pattern.

You may feel free to sell anything made with my patterns, just please give me credit as the designer. If you’d like to share my patterns, please share the link to the blog. Be sure to come by Facebook and check out my page, Kat’s Crochet Creations, and give it a like. Thanks for stopping by, and I hope you enjoy making your very own set of basket weave washcloths and dishcloths.

Sunday, January 24, 2016

Shannon’s Crochet Boot Cuffs

I like boot cuffs, but since I live in Florida I really have no opportunity to wear them. I have a friend who lives in the Chicago area and I designed these boot cuffs for her. They work up quickly and you can use the colors I chose, or use your own colors. You can also substitute the yarn as long as you use a medium or worsted weight yarn.

I hope you like them, please let me know in the comments if you have any problems with the pattern. I try to make my patterns complete and easy to understand, but please feel free to ask questions or point out any problems you may find.


If you’d like to share the pattern, please do, but please share the link to this blog. You can sell any items you make with this pattern with no strings attached, just please give me credit as the designer. Enjoy!

What You’ll Need:

Red Heart Super Saver yarn in Amethyst (Color A) and Grape Fizz (Color B)
Size US J/10 (6mm) crochet hook and a tapestry needle

Gauge: 12 stiches and 8 rows in hdc equal 4 inches

Finished cuffs measure about 13 inches in circumference and they are 5 inches tall.

Notes:
The pattern is sized for an adult (13 inches), but you can make it larger or smaller by increasing or decreasing the foundation chain as long as the total number of stitches can be divided by three. You can also make them longer by adding rows of shells until you reach the desired length.

Bottom ribbed portion is crocheted first in rows and then sewed together. The top shell section is then crocheted in rounds around the ribbed section. 

Abbreviations and Stitches

Foundation Single Crochet – fsc
Chain – ch
Single Crochet – sc
Half Double Crochet – hdc
Front Post Half Double Crochet – fphdc
Front Post Single Crochet - fpsc
Double Crochet – dc
Skip – sk
Stitch – st

Bottom Ribbed Section – Make 2

33 fsc with Color A
Row 1: ch2, hdc across, turn
Row 2: ch2, *fphdc, hdc* rep across, turn
Row 3: ch2, hdc across, turn
Row 4: ch2, *fphdc into the st 2 rows below (around the post of the fphdc in Row 2), hdc* rep across, turn
Row 5: ch1, fpsc around each st ending with a sc into 2nd ch, turn
Row 6: ch1, sc across, fasten off leaving a long tail to sew ends together. Sew ends together and weave in tails

Top Shell Section

Join Color A into the seam of the bottom ribbed section. Cuff is now worked in rounds.
Round 1: ch1, sc around, join in ch1, turn
Round 2: ch1, fpsc around each st, join in ch1, turn
Round 3: ch3, dc into same st as ch3, sk 1 st, sc into next st *sk 1 st, 3dc into next st, sk1 st, sc into next st* rep around ending with sk 1 st, 1dc into the same sp as ch3 and 1st dc, join in 3rd ch
Round 4: ch1 *3dc into the next sc, sc into the 2nd dc of the next cluster (3dc)* rep around, join in ch1
Round 5: ch3, dc into same st as ch3 *sc into the 2nd dc of the next shell, 3dc into next sc* rep round, join in 3rd ch
Rounds 6 & 7: Repeat Rounds 4 & 5, fasten off and weave in tails. 

You can also roll the tops down for a different look.


Stitches 'n' Scraps - Scrappy Stitchers Link Party

Thursday, December 31, 2015

Warm Climate Temperature Afghan - Free Guide

I've been seeing a lot of guides for temperature afghans and think this is a great idea. What you do is crochet a row on an afghan and use the temperature outside as the guide for the color. What you end up with is a record of the temperature during the year, and a lovely scrap afghan. But what if you live in hot climates like Florida? The guides that are out there would make your afghan all one set of colors like reds and oranges.

Well you know me, I get a wild hair and have to create something to meet a need I think is out there. So I've come up with a Florida Temperature Guide for an afghan, but it can be used for any warm climate, not just Florida. I hope this helps my fellow crochet artists who live in warmer climates. If you use this or come up with one of your own, I'd love to see your afghans as you work on them so be sure to come to my Facebook page and post your pics!


Free Books! Yes I Said Free!

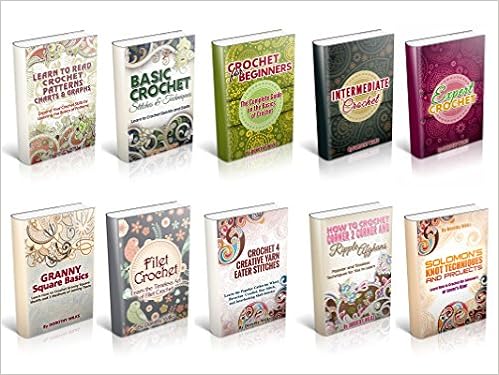
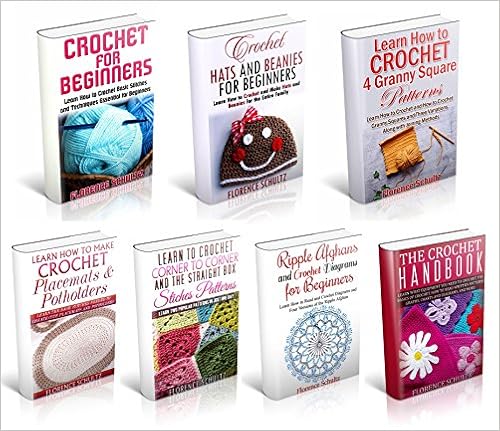
Hello and Happy New Year to one and all! To ring in the new year how about some free ebooks? You may know I write crochet and knitting books under a pen name for a client. Right now several of them are free on Amazon and I just had to share this good news with all of you. Check them out, and if you get some (I hope you get them all...) please leave a comment for me. Comments really help other folks pick out the right books.

The Almanac of Crochet by Dorothy Wilks


The Encyclopedia of Crochet by Florence Schultz


I'll keep you posted when more of my books go on sale or are free. These offers are good through January 1st or 2nd depending on the set you choose. I hope you enjoy them and learn from them. Please feel free to offer me any comments or questions, I always love to hear from my readers.

Happy New Year!


Sunday, December 6, 2015

Seed Stitch Dishcloth

I really like making my own dishcloths and washcloths. Not only are they fun and quick to crochet up, but I think they are much thicker and softer than store bought versions. You can also crochet them up in your favorite colors, and give them as thoughtful gifts.

Today I'm sharing a very easy pattern. I've used two colors, but you can just use one, or use as many as you like. The finished dishcloth measures about 7 inches wide and 6 1/2 inches long. The gauge is 20 stitches and 19 rows per four inches using a size G/4.25mm hook. The gauge really isn't that important for this pattern, and you can use a larger or smaller hook if you'd like a looser or tighter fabric.


Materials Needed

2 balls of cotton yarn; I used Premier Home yarn in Sunshine (Color A) and Orange (Color B)
Size US G/4.25mm crochet hook and a tapestry needle

Special Stitches

Single Crochet Foundation Chain: Chain 2, insert the hook into the first chain, yarn over and pull through. Yarn over and pull through the first loop on the hook. This creates the chain stitch you will need to begin the next stitch. Yarn over and pull through the 2 loops on the hook.

Begin the next stitch by inserting the hook under the 2 loops of the chain stitch you created with the first step of the last stitch. Yarn over and pull through the loop on the hook (I find it helpful to grab the chain stitch so I know exactly where to insert the hook for the next stitch), yarn over and pull through the last 2 loops on the hook.


Notes
As you work the pattern the double crochet stitches are worked into the single crochet stitches of the previous row, and the single crochet stitches are worked into the double crochet stitches of the previous row. You can make the dishcloth any width as long as your foundation chain is an even number of stitches. 

Pattern

With Color A crochet 20 single crochet foundation chains

Row 1: ch1 *dc into the next st, sc into the next st* rep across ending with a sc into the last st

Row 2; ch3 *sc into the next st, dc into the next st* rep across ending with a sc into the last st

Rows 3-10: Repeat Row 2, change to Color B at the end of Row 10, fasten off Color A

Rows 11-20: With Color B repeat Row 2, change to Color A at the end of Row 20, fasten off Color B
Rows 21-30: With Color A repeat Row 2, fasten off and weave in tails

Edging (Optional)

I didn't crochet an edging on this dishcloth, but if you want to add an edging turn your work at the end of Row 30 and chain 1. Single crochet across the top and work 3 sc into the corner. Single crochet evenly along the side and work 3 sc in the corner. Single crochet across the bottom, sc 3 into the corner and single crochet evenly along the side. When you reach the last corner work 2 sc into the corner and join in chain 1. 

You can now crochet another round of single crochet, or crochet a decorative edging if you'd like. 

That's it! Now you can enjoy your new dishcloth. Let me know in the comments if you have any questions or comments about this pattern. Have fun! 


Saturday, September 12, 2015

Happy International Crochet Day!

Today is International Crochet Day! I know it's late in the day, it's nearly 11 pm here in Central Florida, but I wanted to wish everyone a great day hooking. For me, crochet is a way to not only create beautiful and often useful things, but it's also a way for me to connect with the women in my family. My grama, mom, and aunt all crocheted. It was a craft handed down to me at an early age. I remember learning how to crochet when I was around 9 years old. Now I even design my own patterns and share them on this blog and in my ebooks I write under Dorothy Wilks and Cynthia Welsh.

Darling Daughter Beanie

My grama could crochet the most beautiful borders on her embroidery. She used variegated crochet thread and tiny steel needles. I always admired her work. My mom was more into knitting. She could knit anything. I remember matching sweaters she knitted for her and my dad. They had a totem pole kind of design. I saw an example of them not too long ago and they were called "Bob Hope" sweaters. Amazing design. I do knit, but I'm still in the beginner stage. I have learned to enjoy it and I like to practice at it, but crochet is my real love.

Very similar design from my mom's sweater


Crochet helped me through the grief of losing my husband suddenly in 2011 after 18 years of marriage. Later that same year my mother fell ill and died in December just after her 83rd birthday. It was a hard time for myself and my kids both emotionally and financially. Crochet helped me keep my sanity and opened the door for me to be hired to write ebooks for a client under three different pen names. I am blessed to be able to crochet and write books to help supplement my disability.

So what does crochet mean to you? Share with us in the comments your story about how crochet adds to your life. Remember one stitch and one day at a time.

Happy Hooking my friends!